Mastering Camera Settings for Vibrant Aurora Photography
Capture the ethereal glow of the night sky by mastering manual camera settings. Learn how to balance exposure, aperture, and ISO to document the aurora in stunning detail.
Mastering Camera Settings for Vibrant Aurora Photography
Photographing the celestial light show requires more than luck. It demands a firm grasp of your equipment to translate the dim, dancing curtains of the aurora into sharp, high-contrast imagery that does justice to the spectacle.
Live Aurora Forecast
Powered by Flarient — embed this on your site →
The Science Behind It
The aurora occurs when charged particles from the solar wind collide with gases in the Earth's upper atmosphere. This interaction excites oxygen and nitrogen atoms, which release photons of light as they return to their ground state.
Solar activity drives this display. When the Kp index rises, it indicates heightened geomagnetic activity, often resulting in brighter and more frequent displays. These charged particles follow the Earth's magnetic field lines, which is why the most spectacular shows appear near the poles.
To capture this, your camera must be sensitive enough to collect light in near-total darkness while maintaining shutter speeds fast enough to avoid blurring the structure of the lights. You are balancing the laws of physics against the limitations of digital sensors.
Real-World Implications
While we enjoy the lights from the ground, the same solar particles that create the display can affect modern infrastructure. Stronger geomagnetic storms can interfere with satellite communications and GPS systems, as detailed in our guide on solar flares and the reliability of GPS navigation.
Understanding how these storms disrupt the ionosphere is vital for photographers and technologists alike. If you are interested in the broader context of how the sun impacts our daily lives, explore our glossary for essential terms.
These atmospheric disturbances do not just affect your camera sensor. They are part of the vast and complex space weather environment that defines our relationship with the star at the centre of our system.
What You Can Do
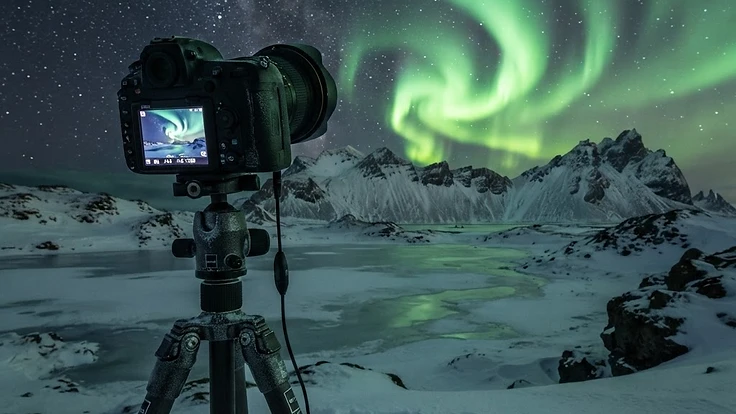
Set your camera to manual mode. Start with the widest aperture your lens allows, ideally f/2.8 or lower, to pull in as much light as possible.
Use a sturdy tripod to allow for long exposures, usually between 5 and 15 seconds, depending on the speed of the aurora's movement.
Keep your ISO between 800 and 3200 to balance light sensitivity with noise. If you want to experience these conditions alongside experts, there are guided aurora tours in countries like Iceland, Norway, Canada, Finland, and Sweden that provide tailored advice for capturing the best shots.
For those who prefer to track the action from home, Flarient provides a comprehensive local aurora forecast to help you plan your evening. You can also view our gallery to see how others have framed their shots during significant solar events.
Key Takeaways
Successful aurora photography rests on your ability to control the camera manually. Do not rely on automatic settings, which will struggle to find focus or balance the exposure in the dark.
Instead, focus on wide apertures and longer shutter speeds. Always remember that the aurora is a dynamic, moving subject, so adjust your shutter speed frequently to keep the light's structure crisp.
Stay patient and observant. The most vibrant displays are worth the wait, and checking your equipment regularly ensures you are ready when the sky ignites.
People Also Ask
What is the best aperture for aurora photography?+
You should use the widest aperture your lens supports, typically f/2.8 or lower. A wide aperture allows the maximum amount of light to hit the sensor, which is essential for capturing the faint, dancing details of the aurora borealis.
Do I need a tripod to photograph the Northern Lights?+
Yes, a sturdy tripod is mandatory. Because aurora photography requires long exposure times to capture enough light, any movement of the camera will result in blurry images. A tripod ensures your camera remains perfectly still throughout the entire exposure process.
How long should my exposure time be for the aurora?+
Exposure times generally range between 5 and 15 seconds. If the aurora is moving quickly, use a shorter shutter speed to keep the details sharp. If the display is faint or slow-moving, you can extend the exposure time to gather more light.
Continue Reading