Recommended Camera Settings for Capturing Vibrant Aurora Displays
Capture the ethereal beauty of the night sky with these essential camera settings. Learn how to balance shutter speed, aperture, and ISO to document the aurora with clarity and colour.
Optimising Your Camera for Vibrant Aurora Displays
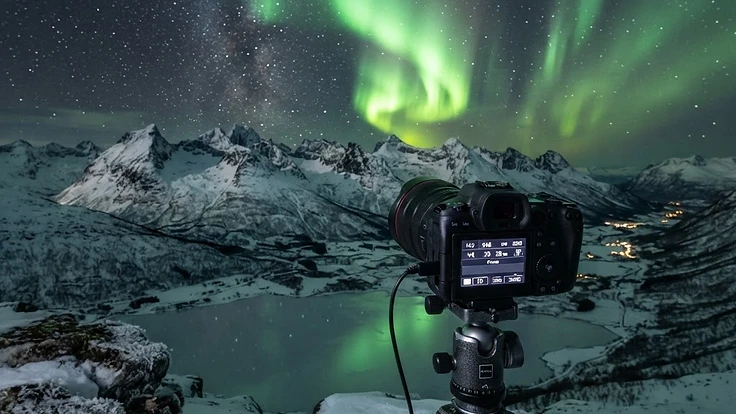
Photographing the celestial light show requires a delicate balance between technical precision and artistic intuition. To capture the dynamic movement of the aurora without losing the crisp detail of the surrounding stars, you must move beyond automatic settings. Success in this field relies on manual control and an understanding of how light interacts with your sensor during long exposures.
Live Aurora Forecast
Powered by Flarient — embed this on your site →
The Science Behind Light and Motion
The aurora appears when solar wind particles collide with Earth's upper atmosphere, exciting gas atoms that emit light as they settle. This process involves how solar wind shapes Earth magnetosphere and can be intensified during geomagnetic storms measured on the G-scale. Understanding the speed of the display is vital, as vibrant ribbons often move rapidly across the sky, requiring faster shutter speeds to prevent motion blur.
Because the light emitted is often dim to the human eye, your camera must be sensitive enough to record the subtle greens and occasional reds of the phenomenon. If you want to dive deeper into why these displays change colour, you can read more in our guide on decoding the colours of the aurora. Accurate recording requires a balance between gathering enough photons and avoiding the digital noise that comes with excessive ISO levels.
Real-World Implications for Photographers
Your equipment choice plays a significant role in how well you manage these challenges. A fast lens with a wide aperture, typically f/2.8 or lower, is essential for letting in as much light as possible.
Using a sturdy tripod is non-negotiable, as even the slightest vibration during a ten-second exposure will ruin the crispness of the stars.
Beyond hardware, environmental conditions significantly influence your results. Cold temperatures affect battery performance, so carry spares close to your body heat. Atmospheric conditions also impact your results, and it is helpful to consult the glossary if you encounter technical terms regarding solar activity.
Always shoot in RAW format, as this preserves the maximum amount of data for colour grading later.
What You Can Do to Prepare
Preparation begins long before you arrive at your dark-sky location. Start by familiarising yourself with local aurora forecast tools to ensure you are aiming your lens during the peak of geomagnetic activity. If you prefer a structured experience, guided aurora tours in locations like Iceland, Norway, Canada, and Finland provide expert knowledge to help you find the best vantage points.
For those who want to monitor conditions while out in the field, our real-time embeddable widgets allow you to keep an eye on solar metrics directly from your mobile device. If you are interested in broader space events, you might also be curious about the global scientific effort to track asteroids. Keeping track of these variables ensures you remain ready to capture the moment the sky ignites.
Key Takeaways for Success
Mastering aurora photography is a journey of trial and error. Stick to a wide aperture and manual focus, then adjust your shutter speed between five and fifteen seconds depending on how quickly the lights are dancing. Review your histogram frequently to ensure your highlights are not blown out, especially if the display is intense.
Remember that the best photos often capture not just the light, but the feeling of the environment. Stay patient, stay warm, and let the storm leaderboard guide your expectations for the night ahead. With the right preparation, you will turn fleeting lights into lasting images.
People Also Ask
What is the best aperture for aurora photography?+
The best aperture for aurora photography is the widest setting your lens allows, typically f/2.8 or lower. A wide aperture enables the sensor to collect more light in a short period, which is essential for capturing the faint, moving ribbons of an aurora without using excessively high ISO settings.
Should I use autofocus or manual focus for the aurora?+
Always use manual focus when shooting the aurora. Autofocus systems struggle to lock onto subjects in low-light environments. Instead, set your lens to manual mode and focus on a distant, bright star or a light on the horizon using your camera's live view feature and zoom to ensure total sharpness.
How long should my exposure time be for the northern lights?+
Exposure times generally range between 5 and 15 seconds. If the aurora is moving quickly, use a shorter exposure of 5 seconds to capture the distinct structure of the ribbons. If the display is faint and static, you can extend the exposure up to 20 seconds to capture more light.
Continue Reading