Optimising Camera Settings for Aurora Photography
Capturing the elusive northern lights requires more than luck. Learn the essential manual camera settings and preparation tips to transform your night sky photography.
Optimising Camera Settings for Aurora Photography
Capturing the ethereal glow of the night sky is a challenge that rewards careful preparation and technical precision. While luck plays a role, understanding your camera gear ensures you are ready when the aurora finally dances across the darkness.
Live Aurora Forecast
Powered by Flarient — embed this on your site →
Great images of this phenomenon rely on balancing exposure time, aperture, and sensor sensitivity. Mastering these controls allows you to translate the vivid colours seen by the human eye into high resolution digital captures.
The Science Behind It
The aurora occurs when charged particles from the sun collide with gases in the upper atmosphere. This interaction transfers energy to oxygen and nitrogen atoms, which release that energy as photons of light.
These displays are primarily driven by the Kp index, a measurement of geomagnetic activity. Solar winds, which typically travel at 400 to 700 kilometres per second, act as the primary catalyst for these events.
Understanding this glossary of terms is helpful for any photographer. Higher Kp values indicate stronger geomagnetic storms, which often result in brighter and more dynamic light displays.
Real-World Implications
Geomagnetic activity does not just affect photographers. It poses legitimate risks to modern satellite infrastructure and high frequency radio communications, as noted in previous discussions on Solar Flares and the Reliability of Satellite Navigation Systems.
When the sun enters a period of high intensity, these storms can even disrupt electrical grids on the ground. Studying space weather helps us predict potential infrastructure impacts.
Monitoring these events provides insight into the sun's 11 year cycle, which began its 25th phase in December 2019. Tracking these patterns helps experts manage the safety of satellites orbiting near the Kármán line.
What You Can Do
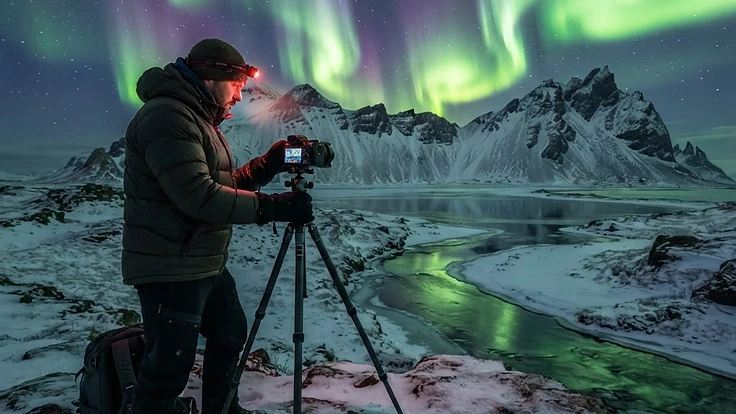
To capture the lights, set your camera to manual mode and choose the widest aperture possible, typically f/2.8 or lower. Use a high ISO between 1600 and 3200 to keep shutter speeds under 15 seconds, preventing the stars from trailing.
Always use a sturdy tripod to eliminate vibrations during these long exposures. If you are travelling to locations like Iceland, Norway, Canada, Finland, Sweden, or Alaska, consider booking guided aurora tours to find the best vantage points in each region.
Check the local aurora forecast before you depart to ensure sky conditions are clear. Tools like Flarient provide real-time updates on geomagnetic conditions so you can plan your shoot effectively.
Key Takeaways
Successful photography of the night sky is as much about patience as it is about equipment settings. Start by focusing on a wide aperture, a high ISO setting, and a tripod that can withstand wind and cold temperatures.
Always consult reliable data regarding the storm leaderboard or current geomagnetic conditions before heading into the wilderness. Proper preparation turns a cold night of waiting into a rewarding experience of capturing the wonders of our solar system.
Keep learning about the sun and its environment by exploring more articles on how space weather influences life on Earth. Consistent observation remains the best way to improve your skills over time.
People Also Ask
What is the best ISO for northern lights?+
For aurora photography, an ISO between 1600 and 3200 is generally ideal. This sensitivity allows you to capture the faint light of the aurora without introducing excessive digital noise, which can be difficult to remove in post-processing when the images are already quite dark.
How long should my shutter speed be for auroras?+
Aim for a shutter speed between 5 and 15 seconds. If the aurora is moving quickly, shorter exposures of 5 to 8 seconds will preserve the intricate details and texture of the lights. If the aurora is dim and slow, you can push the exposure to 15 seconds or longer.
Do I need a special lens for aurora photography?+
A wide-angle lens with a fast aperture is best. Look for a lens that offers an aperture of f/2.8 or wider. A wide field of view allows you to capture the scale of the sky, while the large aperture lets in enough light to keep your exposure times short.
Continue Reading
Forecast These Questions
View all →Express your probability on these active forecast questions.